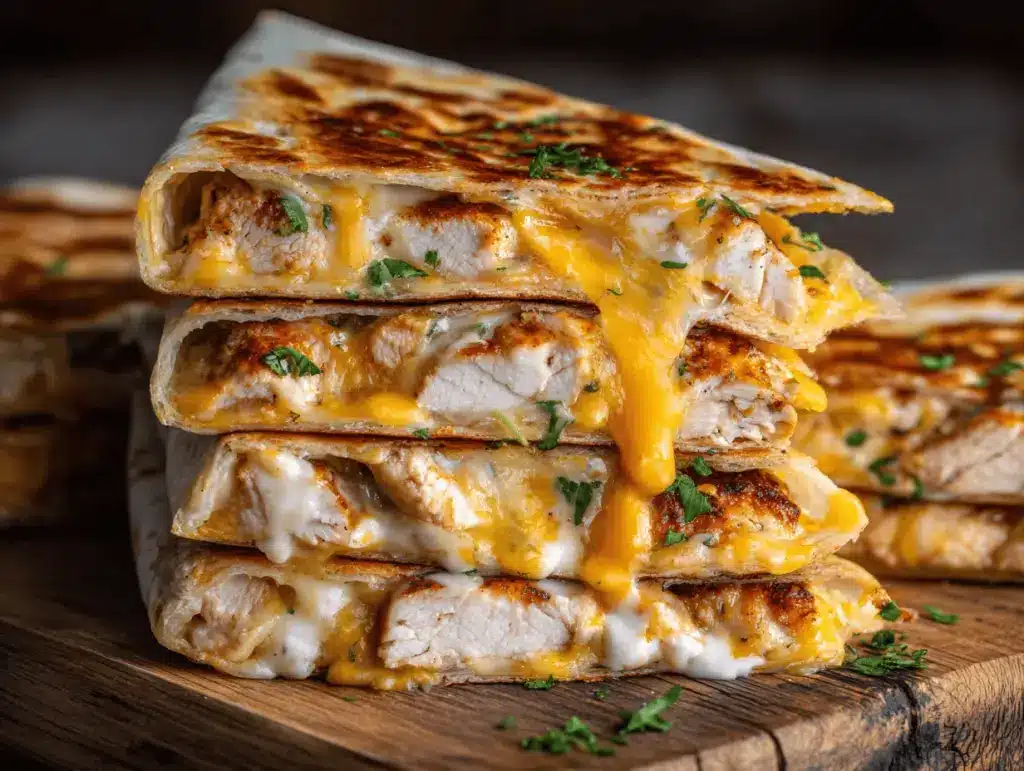
The sizzle of golden tortillas and the smell of creamy garlic sauce wafting from the kitchen—honestly, there’s nothing quite like it. I still remember the first time I made these creamy garlic chicken and cheese crunchwraps: it was one of those nights when I craved comfort food, but with a little twist. You know how sometimes you just want something both gooey and crispy? That’s where these crunchwraps come in. They’re the perfect mashup of all the things I love: juicy chicken, tons of cheese, a hint of garlic, and that unmistakable crunch that makes you close your eyes for a second bite.
My obsession with creamy garlic chicken started in college—cheap ingredients, big flavor, and always a crowd-pleaser (especially at midnight study sessions). Over the years, I played around with the recipe, sometimes swapping out the cheese, sometimes going heavy on the garlic. But when I wrapped it all up in a crispy tortilla and added a cheesy layer, magic happened. These creamy garlic chicken crunchwraps are not just easy to whip up; they’re also a total win for busy weeknights, game-day gatherings, or even when you just want a cozy dinner for two. And, bonus, they’re a hit with picky eaters and anyone who loves classic comfort food with a bold, garlicky kick.
I’ve tested this recipe more times than I can count (my family’s basically my taste-test panel at this point). If you’re looking for a homemade dinner that’s loaded with flavor, gives you that satisfying crunch, and doesn’t require a culinary degree to pull off, these creamy garlic chicken crunchwraps are about to become your new go-to. Let’s just say, once you try them, you’ll see why I keep coming back for more.
Why You’ll Love This Recipe
- Quick & Easy: Ready in under 40 minutes—yes, even if you’re making everything from scratch. It’s perfect for those weeknights where you need dinner on the table, like, now.
- Simple Ingredients: You probably have most of these in your fridge or pantry already. No fancy shopping lists, just the good stuff: chicken, cheese, tortillas, garlic, and a few creamy touches.
- Perfect for Any Occasion: These creamy garlic chicken crunchwraps work for everything from last-minute lunches to game day snacks, cozy dinners, or even meal prepping for the week.
- Crowd-Pleaser: I’ve served these to picky kids, hungry teens, and adults who claim they “don’t like wraps”—and every single one has come back for seconds.
- Unbelievably Delicious: The creamy garlic filling is rich and comforting, the cheese gets all melty, and the tortilla crisps up just right. It’s the best of all worlds—savory, creamy, a little bit tangy, and totally satisfying.
What really sets this creamy garlic chicken crunchwrap recipe apart from all the others? It’s all about that smooth, garlicky sauce (I blend the garlic into the cream cheese and mayo for a no-chunk, restaurant-style texture) and the chipotle seasoning sprinkled over the chicken for an extra kick. You get a crunch that’s never greasy, a filling that’s never dry, and a flavor bomb in every bite. Plus, you can make it your own—add more garlic (I won’t judge!), swap in your favorite cheese, or even sneak in some veggies.
This isn’t just another chicken wrap. It’s the kind of meal that makes people ask, “Wait, you made this at home?” It’s comfort food that doesn’t weigh you down, and honestly, I think that’s what makes it irresistible. Whether you’re feeding a crowd or just treating yourself, these crunchwraps are bound to become a new favorite. Give them a shot—your taste buds (and your family) will thank you!
What Ingredients You Will Need
This creamy garlic chicken crunchwrap recipe uses straightforward, wholesome ingredients that pack a punch. Most of these are pantry staples, so you can pull it off even on a whim. Here’s what you’ll need:
- For the Creamy Garlic Chicken Filling:
- Chicken breast, boneless and skinless (about 1 lb / 450g), cut into small cubes or shredded (rotisserie chicken works too!)
- Olive oil or butter (1 tbsp / 15ml) – for sautéing
- Fresh garlic (3-4 cloves, minced) – more if you’re a garlic lover
- Cream cheese (4 oz / 115g, softened) – I like Philadelphia for creaminess
- Mayonnaise (2 tbsp / 30g) – adds tang and helps the filling stay creamy
- Sour cream (2 tbsp / 30g) – for extra richness (use Greek yogurt if you prefer)
- Shredded cheese (1 cup / 100g) – cheddar, Monterey Jack, mozzarella, or a blend (Tillamook is my go-to for meltiness)
- Chipotle powder (1/2 tsp) or smoked paprika (for a mild kick)
- Salt & black pepper – to taste
- Chopped fresh parsley or chives (optional, for color and a fresh bite)
- For the Crunchwraps:
- Large flour tortillas (6-8, 10-inch / 25cm) – burrito size is best, but any large wrap will work
- Small corn tortillas or tostada shells (6-inch / 15cm) – for that signature crunch layer (broken tortilla chips can work in a pinch)
- Extra shredded cheese (for layering and topping)
- Butter or neutral oil (for griddling, about 2 tbsp / 30ml)
- Optional Extras:
- Diced tomatoes or salsa (for serving)
- Avocado slices or guacamole
- Shredded lettuce (for crunch and color)
- Hot sauce (I love Cholula or Sriracha for a little heat!)
If you’re gluten-free, use gluten-free tortillas and check your cream cheese label. For a lighter version, swap in low-fat dairy, or use Greek yogurt instead of sour cream. Vegetarians can sub in sautéed mushrooms or black beans for the chicken. See? Super flexible, and you can use up whatever’s hanging around in your fridge.
Equipment Needed
- Large skillet or nonstick frying pan – for cooking the chicken and assembling the crunchwraps. I’ve found a 12-inch (30cm) skillet works best for even browning.
- Mixing bowls – at least two, one for the filling and another for prepping your cheese or veggies.
- Sharp knife and cutting board – for dicing chicken and mincing garlic. I like using a chef’s knife for precision.
- Wooden spoon or spatula – for stirring and folding the filling together. Silicone spatulas make cleanup easier.
- Measuring cups and spoons – for accuracy, especially with the creamy sauce ingredients.
- Tongs or a wide spatula – to flip the crunchwraps without tearing the tortilla.
- Plate lined with paper towels – to rest the crunchwraps after griddling, so they stay crisp and not greasy.
No griddle? No problem! A regular frying pan or even a sandwich press will do the trick. If you don’t have a tostada shell, just toast a small tortilla in your oven or air fryer. And honestly, I’ve used an old nonstick skillet I got for $10, and it works fine—just keep an eye out for scratches and wash gently to help it last. If you’re planning on making crunchwraps often, investing in a cast iron skillet is worth it. They crisp up the tortillas beautifully and last forever (just remember to dry them completely after washing so they don’t rust).
Preparation Method

-
Cook the Chicken:
- Heat 1 tablespoon (15ml) olive oil or butter in a large skillet over medium-high heat.
- Add 1 lb (450g) chicken breast pieces. Season with salt, pepper, and 1/2 teaspoon chipotle powder or smoked paprika.
- Sauté for 5-7 minutes, stirring occasionally, until the chicken is golden on the edges and cooked through (internal temp should be 165°F/74°C).
- Tip: If using rotisserie chicken, just warm it in the pan with the spices for 2-3 minutes so the flavors meld.
-
Make the Creamy Garlic Sauce:
- In a medium bowl, blend together 4 oz (115g) softened cream cheese, 2 tbsp (30g) mayo, 2 tbsp (30g) sour cream, and the minced garlic (3-4 cloves).
- Stir until smooth—no lumps! If the cream cheese is too cold, microwave it for 10-15 seconds first.
- Add 1 cup (100g) shredded cheese and most of the cooked chicken. Mix well. Sprinkle in fresh parsley or chives if you like a herby note.
- Season again with a pinch of salt and pepper to taste.
- Sensory cue: The filling should be thick, creamy, and spreadable—like a hearty dip.
-
Prep Your Tortillas:
- Warm your large flour tortillas in the microwave for 20 seconds or in a dry skillet for 10 seconds per side. This keeps them pliable and prevents tearing when folding.
- If using small corn tortillas or tostada shells for the crunch layer, toast them in a dry pan or oven until crisp (about 2-3 minutes).
-
Assemble the Crunchwraps:
- Lay one warm flour tortilla on a clean surface.
- Spoon about 1/2 cup (120g) creamy garlic chicken mixture into the center and spread into a circle, leaving at least 2 inches (5cm) clear around the edge.
- Place a toasted small tortilla or tostada shell on top of the filling.
- Sprinkle with extra shredded cheese and any optional extras (diced tomato, avocado, lettuce).
- Fold the edges of the large tortilla up and over the center, working in sections, to create a hexagonal wrap. Press gently to seal.
- If your tortilla won’t close, tear off a piece of an extra tortilla and patch it over the gap.
- Repeat with remaining tortillas and filling.
- Tip: Don’t overload the filling or the wrap might burst while cooking.
-
Cook the Crunchwraps:
- Heat a little butter or oil (about 1 tsp/5ml per wrap) in your skillet over medium heat.
- Place a crunchwrap seam side down in the pan. Cook for 2-3 minutes until golden brown and crisp.
- Flip and cook the other side for another 2 minutes. The cheese should start to ooze out a bit—don’t worry, that’s the good stuff!
- Transfer to a plate lined with paper towels while you cook the rest.
-
Serve:
- Let the crunchwraps cool for 2-3 minutes before slicing. This helps the filling set, so you get those picture-perfect layers.
- Cut in half and serve with extra sour cream, salsa, or guacamole if you like.
Prep note: If you’re making a big batch, keep cooked crunchwraps warm on a baking sheet in a 200°F (90°C) oven. If you notice your tortillas are tearing, try using a slightly damp paper towel to warm and soften them before folding. And if you’re like me and can’t resist tasting the filling straight from the bowl, just save enough to actually make the wraps!
Cooking Tips & Techniques
- Professional Technique: Warming the tortillas before folding is a game-changer. Cold tortillas crack and break, but warm ones fold up as snug as a burrito blanket. Trust me, I learned this the hard way.
- Don’t Overfill: It’s tempting to pile on the filling, but if you go overboard, you’ll end up with a mess in the pan. Stick to about 1/2 cup of filling for each crunchwrap and resist the urge to cram in more.
- Seam Side Down First: Always cook your crunchwrap seam side down first. This helps seal the edges and keeps all that creamy garlic chicken goodness inside where it belongs.
- Get the Pan Hot, Not Smoking: Medium heat is the sweet spot. Too hot and your tortilla will burn before the cheese melts; too low and you’ll never get that golden crunch.
- Use a Wide Spatula: When flipping, use a large spatula and flip quickly but gently. I’ve had a few crunchwraps lose their shape from a careless flip—slow and steady wins the race.
- Keep ‘Em Warm: If you’re serving a crowd, keep cooked crunchwraps warm in the oven while you finish the batch. This keeps them crispy and melty, not soggy.
- Troubleshooting: If your filling oozes out, let the crunchwraps rest for a couple of minutes before cutting. This makes all the difference for picture-perfect slices (and for keeping your plate clean).
From years of making wraps, the biggest lesson is to not rush. Let each side get golden and crisp—don’t be afraid to peek underneath. And if you accidentally tear a tortilla, patch it up and keep going; it’ll still taste amazing. Practice makes perfect, and honestly, even the “ugly” ones get devoured in no time!
Variations & Adaptations
- Vegetarian Swap: Replace the chicken with sautéed mushrooms, black beans, or even roasted cauliflower. I’ve made a version with caramelized onions and spinach that’s just as creamy and satisfying.
- Low-Carb/Keto: Use low-carb tortillas and skip the tostada shell (or use a cheese crisp instead). Sub in full-fat Greek yogurt for sour cream to bump up the protein.
- Spicy Kick: Add diced jalapeños or a drizzle of hot sauce to the filling for those who love heat. Smoked gouda cheese also gives a nice smoky note.
- Allergen-Friendly: For gluten-free, use certified gluten-free tortillas and check all your cheese and dairy ingredients. For dairy-free, use plant-based cream cheese, vegan shredded cheese, and dairy-free sour cream—brands like Kite Hill or Violife work well.
- Different Cooking Methods: Try air-frying the assembled crunchwraps at 375°F (190°C) for 4-5 minutes per side for a lighter, crispier shell. If you have a panini press, it’ll work too—just don’t press too hard or the filling will squeeze out.
One of my favorite tweaks is adding chopped sun-dried tomatoes and spinach to the creamy filling for extra flavor and color. It’s a little Mediterranean twist that never disappoints! Don’t be afraid to get creative with your cheese blends or throw in leftover roasted veggies for a fridge-cleanout masterpiece.
Serving & Storage Suggestions
These creamy garlic chicken crunchwraps are best served hot and crispy, fresh out of the pan. Slice them in half to show off the layers and let that steam waft out—it’s total Pinterest-worthy comfort food!
- Serving Suggestions: Serve with a side of salsa, guacamole, or a simple green salad. I love pairing these with a cold glass of lemonade or even a light lager if you’re feeling festive. For brunch, try alongside scrambled eggs and fruit.
- Storage: Leftover crunchwraps keep well in the fridge for up to 3 days. Store them in an airtight container, separating layers with parchment paper to prevent sticking.
- Reheating: Reheat in a dry skillet over medium heat for 2-3 minutes per side, or in an air fryer at 350°F (175°C) for 4-5 minutes. The oven works too—bake at 350°F (175°C) for 10 minutes. The microwave is fastest, but the shell won’t stay crisp.
- Freezing: You can freeze assembled (but uncooked) crunchwraps, wrapped tightly in foil or plastic. Thaw overnight in the fridge and cook as usual for a quick meal.
- Flavor Development: The garlic and spices get even better after a day in the fridge, so leftovers are never boring!
Nutritional Information & Benefits
Each creamy garlic chicken crunchwrap (with regular tortillas and full dairy) has about 430 calories, 22g protein, 20g fat, and 35g carbs. That’s a balanced meal, especially if you add veggies or use whole wheat wraps.
The star ingredients—chicken and cheese—bring a protein punch to keep you full. Garlic is known for its immune-boosting properties, while the creamy sauce satisfies without being heavy. You can easily adjust for lower fat by using light dairy or bump up the fiber with whole grain tortillas.
These wraps are naturally nut-free, and you can make them gluten-free or dairy-free with simple swaps. Personally, I love how filling they are—one crunchwrap and a salad, and I’m good for hours. Just watch out for the cheese if you’re lactose intolerant, and always check labels if you have allergies.
Conclusion
If you’re searching for a dinner that’s both crave-worthy and simple, these creamy garlic chicken crunchwraps are it. They’re packed with flavor, super customizable, and practically guaranteed to make everyone at the table happy. I love how you can tweak them to fit any diet or taste—plus, they always look gorgeous when sliced open.
Don’t be afraid to get creative with the filling or try new cheese blends. Every time I make these, I remember why they’re a staple in my kitchen. Give this creamy garlic chicken crunchwrap recipe a try, and let me know your spin on it!
If you enjoyed this recipe, share it with friends, leave a comment below, or tag your homemade crunchwraps on Pinterest. Can’t wait to hear how you make it your own—happy cooking!
Frequently Asked Questions
How do I keep my crunchwraps from falling apart?
Warm your tortillas before folding and don’t overfill. Always cook seam side down first to seal the edges, and let them rest a minute before slicing!
Can I use rotisserie chicken for this recipe?
Absolutely! Shred the rotisserie chicken and warm it with the spices before mixing into the creamy garlic sauce. It’s a great time-saver.
What cheeses work best in creamy garlic chicken crunchwraps?
Cheddar, Monterey Jack, mozzarella, or a Mexican blend all melt beautifully. Feel free to mix and match based on what’s in your fridge.
Can I make these crunchwraps ahead of time?
Yes! Assemble and refrigerate uncooked crunchwraps for up to a day. Cook just before serving for maximum crunch. Cooked leftovers reheat well in a skillet or air fryer.
Are creamy garlic chicken crunchwraps gluten-free?
They can be! Just use gluten-free tortillas and check all your dairy products for hidden gluten. All other ingredients are naturally gluten-free.
Print
Creamy Garlic Chicken Crunchwraps
- Total Time: 35 minutes
- Yield: 6-8 servings 1x
Description
These creamy garlic chicken crunchwraps combine juicy chicken, a rich garlicky sauce, and melty cheese all wrapped in a crispy tortilla. Perfect for busy weeknights, game days, or cozy dinners, they’re a crowd-pleasing comfort food with a bold, satisfying crunch.
Ingredients
- 1 lb boneless, skinless chicken breast, cut into small cubes or shredded (rotisserie chicken works too)
- 1 tbsp olive oil or butter
- 3–4 cloves fresh garlic, minced
- 4 oz cream cheese, softened
- 2 tbsp mayonnaise
- 2 tbsp sour cream (or Greek yogurt)
- 1 cup shredded cheese (cheddar, Monterey Jack, mozzarella, or a blend)
- 1/2 tsp chipotle powder or smoked paprika
- Salt and black pepper, to taste
- Chopped fresh parsley or chives (optional)
- 6–8 large (10-inch) flour tortillas
- 6–8 small (6-inch) corn tortillas or tostada shells (or broken tortilla chips)
- Extra shredded cheese (for layering and topping)
- 2 tbsp butter or neutral oil (for griddling)
- Optional: diced tomatoes or salsa, avocado slices or guacamole, shredded lettuce, hot sauce
Instructions
- Heat 1 tbsp olive oil or butter in a large skillet over medium-high heat.
- Add chicken breast pieces. Season with salt, pepper, and chipotle powder or smoked paprika.
- Sauté for 5-7 minutes, stirring occasionally, until chicken is golden and cooked through (internal temp 165°F). If using rotisserie chicken, warm with spices for 2-3 minutes.
- In a medium bowl, blend together cream cheese, mayonnaise, sour cream, and minced garlic until smooth.
- Add shredded cheese and most of the cooked chicken. Mix well. Stir in parsley or chives if desired. Season with salt and pepper to taste.
- Warm large flour tortillas in the microwave for 20 seconds or in a dry skillet for 10 seconds per side. Toast small corn tortillas or tostada shells until crisp.
- Lay one warm flour tortilla on a clean surface. Spoon about 1/2 cup creamy garlic chicken mixture into the center and spread into a circle, leaving at least 2 inches clear around the edge.
- Place a toasted small tortilla or tostada shell on top of the filling. Sprinkle with extra shredded cheese and any optional extras.
- Fold the edges of the large tortilla up and over the center, working in sections, to create a hexagonal wrap. Press gently to seal. Repeat with remaining tortillas and filling.
- Heat a little butter or oil in your skillet over medium heat. Place a crunchwrap seam side down in the pan. Cook for 2-3 minutes until golden brown and crisp.
- Flip and cook the other side for another 2 minutes. Transfer to a plate lined with paper towels while you cook the rest.
- Let crunchwraps cool for 2-3 minutes before slicing. Cut in half and serve with extra sour cream, salsa, or guacamole if desired.
Notes
Warm tortillas before folding to prevent cracking. Don’t overfill to avoid bursting. Cook seam side down first to seal. Keep cooked crunchwraps warm in a low oven if making a batch. For gluten-free, use GF tortillas and check dairy labels. For vegetarian, sub mushrooms or black beans for chicken. Leftovers reheat best in a skillet or air fryer.
- Prep Time: 15 minutes
- Cook Time: 20 minutes
- Category: Main Course
- Cuisine: American
Nutrition
- Serving Size: 1 crunchwrap
- Calories: 430
- Sugar: 3
- Sodium: 780
- Fat: 20
- Saturated Fat: 9
- Carbohydrates: 35
- Fiber: 2
- Protein: 22
Keywords: chicken crunchwrap, creamy garlic chicken, homemade crunchwrap, easy dinner, comfort food, cheesy wrap, skillet recipe, weeknight meal, family dinner, crispy tortilla