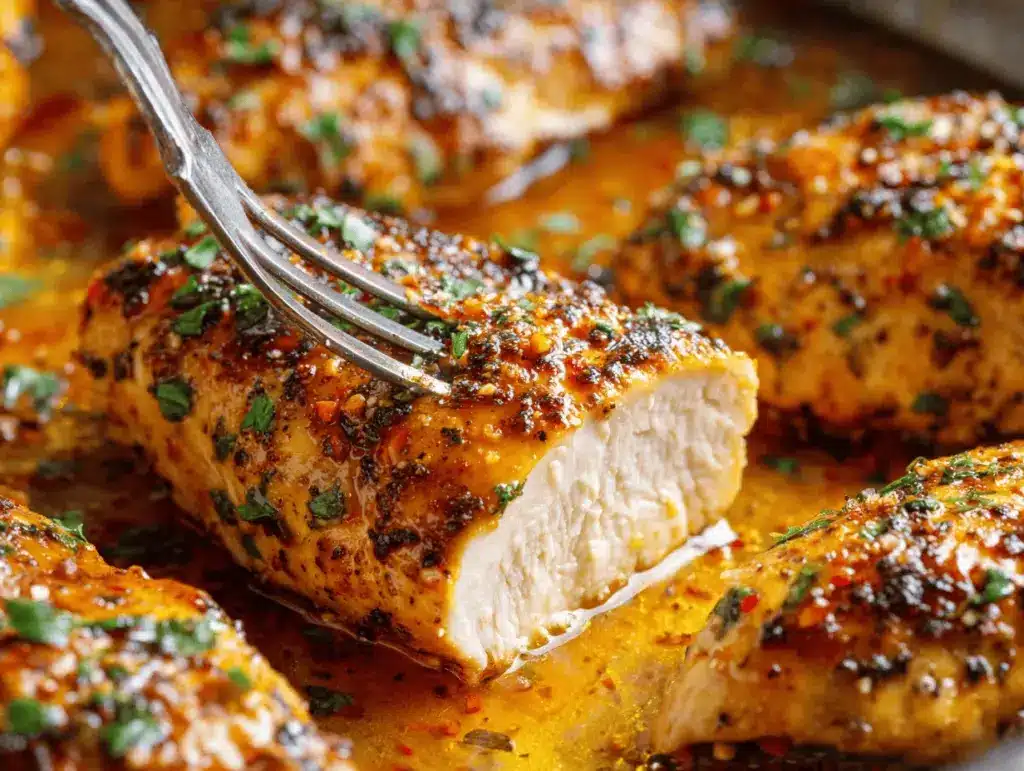
The first time I pulled a pan of baked ranch chicken breasts from the oven, the aroma alone stopped everyone in their tracks. You know that savory, herby scent that hits you right in the nose and basically says, “Dinner’s going to be epic”? That was it. And honestly, this recipe kind of saved my sanity during a week when I had zero energy but still wanted something homemade. It’s a go-to for busy nights, picky eaters, and anyone who loves juicy, flavorful chicken with almost no effort.
I stumbled onto this baked ranch chicken breast recipe when I was out of ideas and staring at a sad pack of chicken breasts. After some quick pantry digging, I found a packet of ranch seasoning—one of those little miracles you forget you bought. The results? Insanely juicy chicken with a golden, herby coating and a flavor that makes everyone ask for seconds (and leftovers). I’ve tweaked this recipe a dozen times, tested different oven temps, tried it with homemade ranch mix, and even made it part of my meal-prep routine.
What I love most is how this recipe checks so many boxes: it’s protein-packed, low-carb, and comes together in just about 30 minutes—no fancy techniques or hard-to-find ingredients. The ranch seasoning does all the heavy lifting, turning basic chicken into a main dish that feels special but is secretly the easiest thing ever. If you’re looking for a dinner that’s weeknight-quick, kid-approved, and makes you look like a kitchen superstar (without breaking a sweat), this baked ranch chicken breast recipe is totally for you.
Why You’ll Love This Recipe
After years of cooking (and plenty of dry chicken fails), I can honestly say this baked ranch chicken breast recipe is a keeper. It’s passed the “hangry family” test more times than I can count, and it’s my favorite trick for getting dinner on the table fast. Here’s why you’ll want to add it to your rotation:
- Quick & Easy: Ready in just 30 minutes from prep to plate. Perfect for those nights when you want real food, fast.
- Simple Ingredients: No complicated shopping list—just chicken, ranch seasoning, and a few basics you probably have on hand.
- Perfect for Any Occasion: Works for weeknight dinners, meal prep, or even casual gatherings. I’ve served it at potlucks and everyone wanted the recipe.
- Crowd-Pleaser: Kids, adults, and even picky eaters love the herby, tangy ranch flavor. My neighbor’s kid once ate three pieces in one sitting (not kidding!).
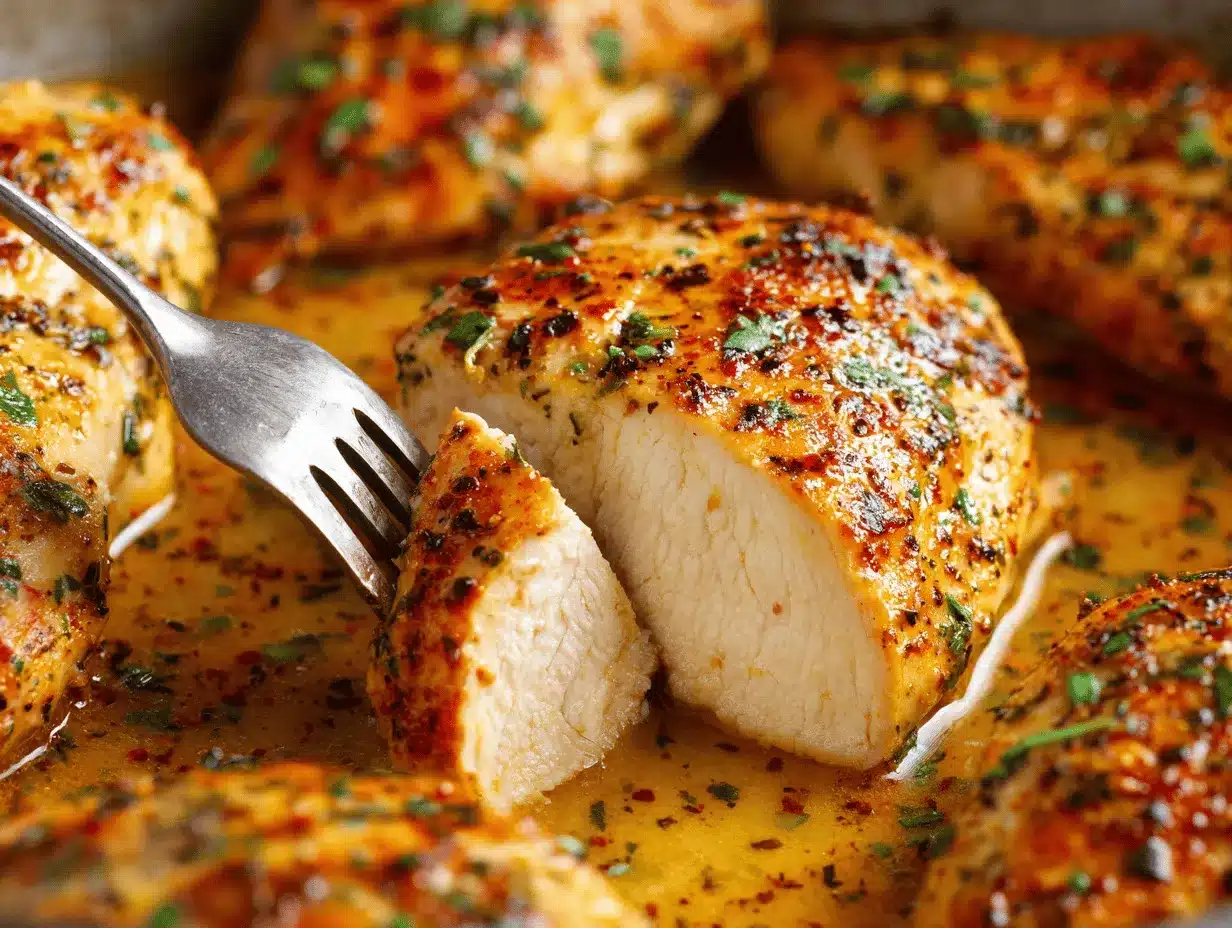
- Unbelievably Juicy: The biggest surprise is how moist and tender the chicken comes out—no dry or stringy bites, just pure deliciousness.
This isn’t just another baked chicken breast recipe. The ranch seasoning brings a punch of flavor you can’t get from plain salt and pepper. Plus, brushing the chicken with olive oil before baking helps lock in moisture—no more rubbery chicken! I also love that you can make it with homemade ranch mix if you’re watching sodium or want to control the ingredients.
Honestly, I think what sets this recipe apart is how foolproof it is. You don’t have to babysit the chicken, and you can even prep it ahead of time. It’s the kind of dinner that makes everyone happy, fills you up, and still leaves you with time to relax after the meal. It’s comfort food, but a little lighter, and it never fails to impress—especially when you need a reliable win in the kitchen!
What Ingredients You Will Need
This recipe uses simple, wholesome ingredients to deliver bold ranch flavor and juicy texture without any fuss. There’s nothing fancy here—just pantry staples and a few fresh items that come together for a seriously crave-worthy meal. Here’s what you’ll need:
- Boneless Skinless Chicken Breasts (4 pieces, about 1.5 lbs/680g total) – I like to use medium-sized breasts for even cooking. If yours are really thick, just slice them in half horizontally.
- Ranch Seasoning Mix (1 packet, about 1 oz/28g) – You can use store-bought (Hidden Valley is a classic) or homemade ranch seasoning. If you’re watching sodium, make your own with dried herbs, garlic powder, onion powder, and a pinch of salt.
- Olive Oil (2 tbsp/30ml) – Helps the seasoning stick and keeps the chicken moist. Avocado oil works too.
- Salt & Black Pepper (to taste) – Depending on your ranch mix, you may want to go easy on the salt. Taste your seasoning before adding extra.
- Garlic Powder (1/2 tsp/2g, optional) – For extra garlicky flavor. I sometimes add this if my ranch mix is mild.
- Smoked Paprika (1/2 tsp/2g, optional) – Adds a subtle smokiness and nice color. Totally optional but so good.
- Fresh Parsley or Chives (for garnish, optional) – Chopped fresh herbs give a pop of color and a little extra freshness on top.
Ingredient Tips & Substitutions:
- If you want to swap out the chicken breasts, boneless thighs also work well (just adjust baking time).
- For a dairy-free version, double-check your ranch seasoning or make your own using all dried herbs/spices.
- Want to make it gluten-free? Most ranch mixes are gluten-free but always double-check the label.
- No olive oil? Melted butter or avocado oil are great alternatives for rich flavor and moisture.
- Don’t have ranch seasoning? Mix 1 tbsp each dried parsley, dried dill, garlic powder, onion powder, and 1/2 tsp salt for a quick homemade blend.
- Adding a sprinkle of grated Parmesan on top before baking gives a golden, cheesy finish—my family loves this twist!
This flexible ingredient list means you can customize the baked ranch chicken breast recipe to fit your pantry or dietary needs. Trust me, once you try it, you’ll be making this with whatever you have on hand!
Equipment Needed
You don’t need any fancy gadgets for this baked ranch chicken breast recipe—just a few basics. Here’s what I reach for every time:
- Baking Dish or Sheet Pan – A 9×13-inch (23x33cm) glass or ceramic baking dish works best, but a rimmed sheet pan lined with parchment is great for easy cleanup.
- Meat Mallet or Rolling Pin – If your chicken breasts are uneven, give them a quick pound for even thickness. (A wine bottle wrapped in plastic wrap works in a pinch—been there, done that!)
- Pastry Brush or Spoon – For brushing olive oil on the chicken. You can also use your hands if you’re not afraid of a little mess.
- Small Mixing Bowl – To mix the ranch seasoning with oil if you want a more even coating.
- Aluminum Foil or Parchment Paper – For lining your pan or covering during baking if you want extra juicy results.
- Instant-Read Thermometer – Not absolutely required, but super handy to check doneness (chicken should hit 165°F/74°C). Trust me, this gadget saved me from overcooked chicken more than once!
- Tongs or Spatula – For transferring the chicken easily.
If you’re short on specialty tools, don’t sweat it. I’ve made this recipe with just a fork, a baking tray, and some aluminum foil. For easy cleanup, line your pan and spray it lightly with oil. And hey, if you don’t have a meat mallet, use the bottom of a mug or your hands (just be gentle!). I always say, work with what you have—this recipe is forgiving.
How to Make Irresistible Juicy Baked Ranch Chicken Breast
- Preheat the Oven.
Set your oven to 400°F (200°C). This high temp locks in juices and gives you a golden crust. Line a baking dish or sheet pan with parchment or foil for easy cleanup. - Prep the Chicken.
Place the chicken breasts on a cutting board. If they’re thick at one end, use a meat mallet or rolling pin to gently pound them to even thickness (about 1/2–3/4 inch/1.3–2 cm). This helps them cook evenly—no dry edges! - Pat Dry and Season.
Use paper towels to pat the chicken breasts dry (this helps the oil and seasoning stick). Arrange them in your prepared baking dish. - Brush with Olive Oil.
Drizzle or brush both sides of the chicken breasts with olive oil (about 1 tbsp/15ml per side for all four). This step is key for juicy, golden chicken. - Sprinkle Ranch Seasoning.
Evenly coat both sides of each chicken breast with ranch seasoning mix (about 1/4 packet or 7g per breast). Use your hands to press the seasoning in. Sprinkle on extra garlic powder or smoked paprika if you like a stronger flavor. - Arrange and Bake.
Lay the chicken breasts in a single layer, not touching, in your baking dish. Bake uncovered for 20–25 minutes, depending on thickness. Thick pieces may take up to 30 minutes. (Tip: If you want extra-moist chicken, cover the pan loosely with foil for the first 15 minutes, then uncover for the last 5–10 minutes for browning.) - Check Doneness.
The chicken is done when juices run clear and a thermometer inserted in the thickest part reads 165°F (74°C). Don’t overbake—a few minutes makes a big difference. - Rest and Garnish.
Remove from oven and let the chicken rest in the pan for 5 minutes before slicing (this keeps juices in). Sprinkle with chopped parsley or chives for a fresh finish. - Serve and Enjoy.
Slice and serve hot, spooning any pan juices on top. Pair with your favorite sides!
Prep Notes: If you’re prepping ahead, you can season the chicken and refrigerate for up to 24 hours before baking. For meal prep, slice cooled chicken and store in airtight containers with a little extra pan juice to keep it moist.
Troubleshooting: If the chicken looks pale, pop it under the broiler for 2–3 minutes at the end for extra color. If you accidentally overcook it (been there), slice thin and drizzle with extra olive oil—it’ll still taste great!
Cooking Tips & Techniques
Here’s the thing about baked ranch chicken breast: tiny tweaks make a huge difference. Over the years, I’ve picked up a few pro tips (sometimes the hard way!) to guarantee perfect results.
- Even Thickness = Even Cooking: Always pound chicken breasts to an even thickness—otherwise, the thin end will dry out while the thick end’s still raw. I learned this after too many “half-dry, half-raw” disasters.
- Don’t Overcrowd the Pan: Give the chicken a little space so the heat circulates and you get that gorgeous golden color. If you pile them up, they’ll steam instead of bake and might turn out soggy.
- Use a Thermometer: Seriously, this is the best way to avoid overcooked chicken. Take it out right at 165°F (74°C)—it’ll stay juicy, promise.
- Rest Before Slicing: Letting the chicken rest for a few minutes after baking lets the juices settle (so they don’t all run out when you cut it). It’s a small thing but makes a big difference.
- Oil + Seasoning = Flavor & Moisture: Don’t skip brushing with oil. It helps the ranch mix stick, creates a tasty crust, and seals in moisture. I once tried skipping this step—let’s just say the results were… not juicy.
- Foil for Super Juicy Chicken: If you’re nervous about dry chicken, loosely cover the pan with foil for most of the baking time—just uncover at the end for a little browning.
- Batch Cooking: Making a big batch? Bake on a large sheet pan with space between each piece, and rotate the pan halfway through for even color.
My biggest lesson? Trust your senses. If it smells amazing and looks golden, it’s probably ready. And if you’re multitasking (like wrangling kids or finishing homework), set a timer—chicken goes from perfect to dry in a flash!
Variations & Adaptations
What I love about this baked ranch chicken breast recipe is how easy it is to switch up based on what you’re craving or what’s in the fridge. Here are some of my favorite ways to change things up:
- Keto/Low-Carb: Use homemade ranch mix to skip added sugars or starches. Pair with roasted cauliflower or zucchini noodles for a full low-carb meal.
- Spicy Kick: Add 1/2 teaspoon cayenne pepper or chipotle powder to the ranch seasoning for a little heat. My husband always wants his “extra spicy.”
- Cheesy Ranch: Sprinkle shredded cheddar or a little grated Parmesan on top during the last 5 minutes of baking for a gooey, cheesy finish. So good for kids!
- Different Proteins: Try this method with boneless thighs, turkey cutlets, or even pork chops—just adjust baking time as needed.
- Dairy-Free: Use a ranch mix without buttermilk powder or make your own with only herbs and spices.
- Seasonal Twist: Top with sliced cherry tomatoes or roasted veggies in summer, or serve over mashed sweet potatoes in the fall.
Personal favorite: I sometimes slice the baked ranch chicken and layer it over a big salad with avocado, tomatoes, and a drizzle of ranch dressing—super fresh and filling!
Serving & Storage Suggestions
This baked ranch chicken breast shines as a main dish but plays well with so many sides. Here’s how I like to serve, store, and reheat it for best results:
- Serving Temperature: Serve hot from the oven for the juiciest texture. If you’re entertaining, slice and arrange on a platter with fresh herbs for a pretty presentation.
- Perfect Pairings: Goes great with garlic mashed potatoes, roasted veggies, rice pilaf, or even tossed in a fresh green salad. For a fun family dinner, I set out slider buns, lettuce, and tomatoes for DIY ranch chicken sandwiches.
- Storage: Cool leftovers completely, then store in an airtight container in the fridge for up to 4 days. Add a splash of chicken broth or olive oil before sealing to keep it moist.
- Freezer-Friendly: Place cooled chicken in freezer-safe bags (remove as much air as possible) and freeze for up to 2 months. Thaw overnight in the fridge before reheating.
- Reheating: Warm in a 300°F (150°C) oven, covered with foil, until heated through—about 10–15 minutes. Or zap in the microwave in 30-second bursts, but don’t overdo it or the chicken might dry out.
- Flavor Over Time: The ranch flavor actually deepens after a day in the fridge, making leftovers extra tasty for wraps, salads, or meal-prep bowls.
Nutritional Information & Benefits
This baked ranch chicken breast recipe is a high-protein, lower-carb option that fits well into many diets. Here’s a quick look at the nutrition per serving (based on one chicken breast, about 175g):
- Calories: ~220
- Protein: 32g
- Fat: 8g
- Carbs: 2g (mostly from ranch seasoning)
- Fiber: 0g
Health Benefits: Chicken breast is a lean protein source that supports muscle growth and keeps you full. Olive oil adds healthy fats, and using a homemade ranch seasoning keeps sodium in check. This recipe is naturally gluten-free (just check your ranch mix) and works for low-carb and keto diets. Allergens? Watch for dairy in some ranch packets, but you can easily use a dairy-free blend. I love that it’s filling without being heavy—it’s a regular in my meal-prep plan when I want something wholesome but satisfying.
Conclusion
If you’re looking for a dinner that’s quick, easy, and packed with flavor, this baked ranch chicken breast recipe is your new best friend. It’s juicy, simple, and always a hit—honestly, it’s tough to mess up! I hope you’ll give it a try, then make it your own with your favorite twists or sides. This recipe has saved me on more busy nights than I can count, and it never fails to impress family and friends. If you try it, leave a comment below—tell me your favorite variation or what you served alongside. And if you share your creation on Pinterest or Instagram, tag me so I can cheer you on! Here’s to easy, delicious dinners that make life just a little bit simpler.
FAQs About Baked Ranch Chicken Breast
How do I keep baked chicken breast from drying out?
Brush the chicken with olive oil before baking, and don’t overcook it. Use a meat thermometer and pull it out at 165°F (74°C). Let it rest before slicing—this keeps the juices in.
Can I use homemade ranch seasoning instead of a packet?
Absolutely! Just mix dried parsley, dill, garlic powder, onion powder, salt, and pepper. Homemade lets you control the flavors and the sodium.
What sides go best with baked ranch chicken breast?
I love serving it with mashed potatoes, roasted veggies, or over a big salad. It’s also great in wraps, sandwiches, or even pasta.
Is this recipe gluten-free?
Yes, as long as your ranch seasoning mix is gluten-free (most are, but double-check the label). You can make your own to be sure!
Can I make this recipe ahead of time?
Definitely. You can season the chicken and store it in the fridge up to a day ahead, then bake when ready. Leftovers keep well and taste even better the next day!
Print
Baked Ranch Chicken Breast
- Total Time: 30-35 minutes
- Yield: 4 servings 1x
Description
This easy baked ranch chicken breast recipe delivers juicy, flavorful chicken with minimal effort in just 30 minutes. Perfect for busy weeknights, meal prep, or feeding picky eaters, it uses simple pantry staples and ranch seasoning for a crowd-pleasing main dish.
Ingredients
- 4 boneless skinless chicken breasts (about 1.5 lbs total)
- 1 packet ranch seasoning mix (about 1 oz)
- 2 tablespoons olive oil
- Salt and black pepper, to taste
- 1/2 teaspoon garlic powder (optional)
- 1/2 teaspoon smoked paprika (optional)
- Fresh parsley or chives, chopped, for garnish (optional)
Instructions
- Preheat oven to 400°F (200°C). Line a baking dish or sheet pan with parchment paper or foil.
- Place chicken breasts on a cutting board. If thick, pound to even thickness (about 1/2–3/4 inch) using a meat mallet or rolling pin.
- Pat chicken breasts dry with paper towels and arrange in the prepared baking dish.
- Brush both sides of chicken breasts with olive oil.
- Evenly coat both sides of each chicken breast with ranch seasoning mix. Add extra garlic powder or smoked paprika if desired.
- Arrange chicken in a single layer, not touching. Bake uncovered for 20–25 minutes (thicker pieces may take up to 30 minutes). For extra juicy chicken, cover with foil for the first 15 minutes, then uncover for the last 5–10 minutes.
- Check doneness: chicken is done when juices run clear and an instant-read thermometer reads 165°F (74°C) in the thickest part.
- Remove from oven and let rest for 5 minutes before slicing. Garnish with chopped parsley or chives.
- Slice and serve hot, spooning any pan juices on top. Enjoy with your favorite sides.
Notes
For extra juicy chicken, cover with foil for most of the baking time and uncover at the end for browning. Use a thermometer to avoid overcooking. You can prep the chicken up to 24 hours ahead. Leftovers are great for salads, wraps, or sandwiches. Most ranch seasoning mixes are gluten-free, but check the label if needed. For a dairy-free version, use a homemade ranch mix without buttermilk powder.
- Prep Time: 10 minutes
- Cook Time: 20-25 minutes
- Category: Main Course
- Cuisine: American
Nutrition
- Serving Size: 1 chicken breast (about 6 oz cooked)
- Calories: 220
- Sodium: 500
- Fat: 8
- Saturated Fat: 1.5
- Carbohydrates: 2
- Protein: 32
Keywords: baked ranch chicken, chicken breast, easy dinner, weeknight meal, low carb, gluten free, meal prep, ranch seasoning, juicy chicken, oven baked chicken