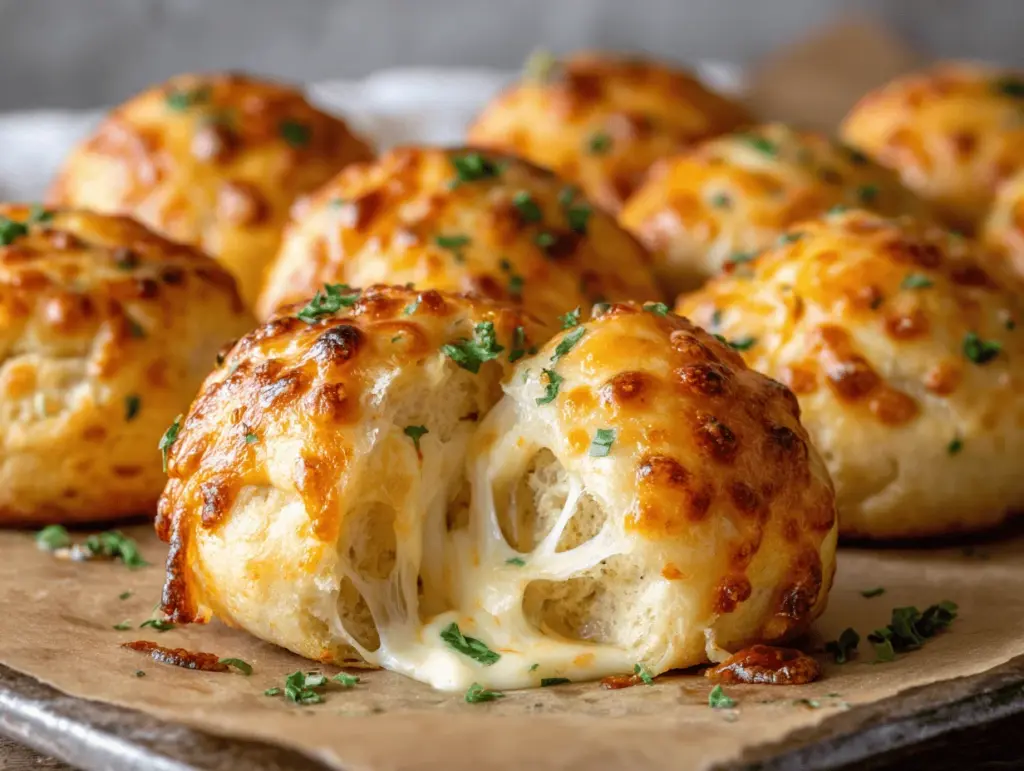
Buttery, garlicky, and oozing with cheese—the aroma alone will have everyone hovering near the oven! The first time I pulled a tray of these Pillsbury Biscuit Garlic Butter Cheese Bombs from the oven, my kitchen became the place to be (even the neighbors seemed to notice). With their crispy golden crust and gooey, stretchy cheese center, these cheesy bombs are the kind of appetizer that disappears faster than you can say “pass the dipping sauce.”
I stumbled onto these during a last-minute party prep—honestly, I was desperate for something easy yet crowd-pleasing. I had a can of Pillsbury biscuits, some leftover cheese, and a stick of butter just begging to be used. One quick mix of garlic and herbs later, and these biscuit cheese bombs were born. Since then, they’ve become a go-to snack for family movie nights, game days, and whenever I crave comfort food with very little fuss.
The best part? You only need a handful of ingredients and about 20 minutes from start to finish. Whether you’re feeding hungry teens, impressing last-minute guests, or just treating yourself, these Pillsbury Biscuit Garlic Butter Cheese Bombs never fail to deliver. They’re perfect for dipping, snacking, or even serving as a side with pasta or soup. If you love melty cheese, soft bread, and garlic butter, you’ll want this recipe in your back pocket—trust me, I’ve made it more times than I can count, and it never gets old!
Why You’ll Love This Recipe
- Quick & Easy: Ready in just 20 minutes—no need to stress about complicated steps or long prep times.
- Simple Ingredients: Uses affordable, everyday staples like Pillsbury biscuits and basic cheeses. No extra grocery trips needed!
- Perfect for Any Occasion: These cheese bombs shine at parties, potlucks, holiday gatherings, or as a fun snack for movie nights.
- Crowd-Pleaser: Kids and adults both love the gooey cheese pull and buttery garlic flavor—it’s genuinely addictive.
- Unbelievably Delicious: Buttery, garlicky, cheesy, and perfectly golden—they hit every comfort food craving in one bite.
I’ve baked my way through dozens of cheese-stuffed bread recipes, but this one stands out for its simplicity and consistent “wow” factor. I like to blend the garlic right into the melted butter for even flavor, and I always sprinkle a little extra parmesan on top before baking—just for that irresistible savory finish. And honestly, I’ve shared this trick with friends who swear it’s the first thing gone from their appetizer table every single time.
What makes these Pillsbury Biscuit Garlic Butter Cheese Bombs different? It’s the shortcut of using canned biscuit dough, which gives you a soft, pillowy texture with just the right amount of chew. No kneading, no waiting for dough to rise—just stuff, roll, brush, and bake! I’ve tested this recipe with everything from mozzarella sticks to sharp cheddar cubes, and it works beautifully every time. If you want a super-fast, no-fail appetizer that tastes like you spent hours in the kitchen, this is the one to try.
Whether you’re a beginner in the kitchen or an experienced home cook looking for a new favorite, these cheese bombs are so satisfying and so easy, you’ll find yourself making them again and again. There’s just something about that first bite—warm, cheesy, and dripping with garlic butter—that keeps everyone coming back for more.
What Ingredients You Will Need
This recipe is all about keeping things simple and delicious, using ingredients you probably already have on hand. Here’s what you’ll need to make these irresistible Pillsbury Biscuit Garlic Butter Cheese Bombs:
- Pillsbury Grand Biscuits (1 can, 16.3 oz / 460g): The classic flaky variety works best. I usually grab the original or buttermilk style, but any flavor will do.
- Mozzarella Cheese (8 oz / 225g), cut into 16 cubes: This gives you that classic stretchy cheese pull. You can also use string cheese, cut in thirds, for easy stuffing.
- Cheddar Cheese (4 oz / 115g), cut into cubes (optional): For a sharp, tangy twist, mix in a few cheddar cubes with the mozzarella.
- Unsalted Butter (1/4 cup / 60g), melted: This is the base of your garlic butter. If you only have salted butter, just skip any extra salt in the garlic mix.
- Fresh Garlic (2-3 cloves), minced: If you’re short on time, 1 teaspoon (5g) garlic powder works in a pinch, but fresh gives the best punch.
- Parsley (1-2 tablespoons / 5-10g), finely chopped: Adds color and a fresh flavor. You can use dried parsley if that’s what you have.
- Grated Parmesan Cheese (2 tablespoons / 15g): For topping—totally optional, but seriously tasty.
- Salt & Pepper, to taste: I add a pinch of sea salt and a little black pepper to the garlic butter for extra flavor.
Ingredient notes and swaps:
- Canned Biscuit Dough: I’ve tried a few brands—Pillsbury gives the fluffiest result, but any flaky biscuit dough will work if you’re in a pinch.
- Cheese options: Feel free to use pepper jack, gouda, or even brie for a fancier twist. For a dairy-free version, swap in your favorite plant-based cheese (just pick one that melts well).
- Butter: Vegan butter works if you’re making these dairy-free. Olive oil garlic “butter” is tasty too—just use a little less so they don’t get soggy.
- Parsley: Basil or chives are great alternatives if you want to mix things up.
- Optional add-ins: A pinch of Italian seasoning or red pepper flakes in the garlic butter gives a fun flavor boost. Sometimes I tuck a slice of pepperoni inside with the cheese for a pizza-inspired bomb!
These ingredients are easy to find, budget-friendly, and super flexible—so don’t stress if you’re missing one or two. The most important thing is that cheesy center and that buttery, garlicky crust. Trust me, you’ll want to make extra!
Equipment Needed
- Baking Sheet: Any standard-size sheet works. I’ve used both nonstick and regular pans—line with parchment for easy cleanup.
- Small Mixing Bowl: For stirring up your garlic butter. If you only have a mug handy, that works too!
- Pastry Brush: Ideal for brushing the butter over the biscuits. If you don’t have one, just use a spoon or even your fingers (I’ve done it in a pinch—messy but fun).
- Sharp Knife or Kitchen Scissors: For cutting cheese into cubes and biscuits into halves if needed.
- Measuring Spoons: For garlic, herbs, and parmesan. If you’ve got a good eye, you can even eyeball the parsley and cheese.
- Parchment Paper or Silicone Baking Mat (optional): Makes cleanup a breeze and helps prevent sticking.
Pro tip: If you’re doubling the batch (highly recommend for parties), use two baking sheets and swap their positions halfway through baking for even browning. I’ve even made these in my toaster oven—just bake in batches, and they turn out great!
Maintenance tip: If you use a silicone mat, rinse it quickly after baking so the buttery residue doesn’t soak in. And for pastry brushes, a dash of dish soap and warm water does the trick—just let it dry thoroughly before storing.
If you don’t want to buy a pastry brush, no worries—fingers work, or try the back of a spoon. The main thing is getting that garlic butter on every nook and cranny!
How to Make Pillsbury Biscuit Garlic Butter Cheese Bombs

- Prep the oven and baking sheet: Preheat your oven to 375°F (190°C). Line a baking sheet with parchment paper or a silicone baking mat for easy cleanup.
- Make the garlic butter: In a small bowl, melt 1/4 cup (60g) unsalted butter in the microwave (about 30 seconds). Stir in 2-3 minced garlic cloves, 1-2 tablespoons (5-10g) chopped parsley, a pinch of salt, and a crack of black pepper. Set aside.
- Prepare the biscuits: Open the can of Pillsbury Grand Biscuits (16.3 oz / 460g) and separate the dough into 8 rounds. If you want smaller bombs, cut each biscuit in half for 16 pieces. I usually go for the smaller size—they’re more bite-sized and bake more evenly.
- Stuff with cheese: Flatten each biscuit round gently with your fingers or the palm of your hand until it’s about 1/4-inch (0.6cm) thick. Place a cube of mozzarella (about 1/2 oz / 14g) and, if desired, a cheddar cube in the center of each piece.
- Seal and roll: Fold the edges of the dough up and around the cheese, pinching to seal tightly. Roll gently between your hands to create a smooth ball. Make sure there are no holes—otherwise the cheese may leak out during baking.
- Arrange on the baking sheet: Place the stuffed balls seam-side down, leaving a little space between each one. They’ll puff up as they bake.
- Brush with garlic butter: Use a pastry brush (or spoon/fingers) to generously coat each ball with the garlic butter mixture. Reserve a little butter for after baking if you want extra shine and flavor.
- Top with parmesan: Sprinkle 2 tablespoons (15g) grated parmesan over the buttered dough balls for a savory, golden finish.
- Bake: Bake at 375°F (190°C) for 12-15 minutes, or until golden brown and puffed. Start checking at the 12-minute mark—every oven is a little different. The tops should be lightly browned and the cheese inside just starting to ooze.
- Finishing touch: Remove from the oven and brush with any remaining garlic butter. Let them cool for 2-3 minutes—the cheese will be molten hot!
- Serve warm: Enjoy right away for the best cheese pull. Serve with your favorite marinara, ranch, or even a spicy buffalo dip.
Troubleshooting tips:
- If the cheese leaks out, make sure to pinch the dough seams well before baking.
- If the tops brown too fast, tent with aluminum foil for the last few minutes.
- If you want a crispier bottom, bake directly on a greased pan instead of parchment.
Personal tip: Don’t overstuff with cheese (I know, it’s tempting!). Too much and they’ll burst open. Stick with about 1/2 oz (14g) per bomb for best results. And always let them cool just a bit before serving—burnt tongues are no fun, but warm cheese pulls are everything!
Cooking Tips & Techniques
- Pinch the seams super tight: Early on, I was too gentle and had some epic cheese leaks. Now I really press the dough together and roll it so nothing escapes.
- Don’t overbake: If you leave them in too long, the cheese can harden and the biscuits get dry. Start checking at 12 minutes—they should be just golden and still soft.
- Use fresh garlic for best flavor: Garlic powder is fine in a pinch, but nothing beats the punchy flavor of fresh minced garlic in the butter. Plus, it smells amazing as they bake!
- Multitasking strategy: While the biscuits bake, whip up a quick dipping sauce—marinara, garlic aioli, or even a spicy sriracha mayo. It makes serving feel extra special (and hides any imperfections if the bombs burst a bit).
- Consistent size: Try to make each dough ball roughly the same size so they bake evenly. If you’re making a double batch, rotate the pans halfway through.
One time, I forgot to let the melted butter cool slightly before brushing—it melted the dough a bit and made the tops extra crispy (not a disaster, but not what I wanted). So let the butter cool for just a minute before you brush it on.
And here’s a little secret: If you want to prep ahead, you can assemble the bombs, pop them in the fridge for up to 4 hours, and bake just before serving. They come out just as fluffy and fresh!
Variations & Adaptations
- Gluten-Free: Use a gluten-free biscuit dough (I like the ones from Immaculate Baking or Trader Joe’s, when I can find them). Just watch baking times—they may brown faster.
- Stuffed Pizza Bombs: Add a slice of pepperoni or a spoonful of pizza sauce with the cheese for a “pizza bomb” twist. My kids love these with a sprinkle of Italian seasoning in the butter.
- Spicy Jalapeño Cheese Bombs: Tuck a slice of pickled jalapeño inside with the cheese and use pepper jack. Gives a mild kick that’s perfect for game days.
- Dairy-Free: Use your favorite plant-based cheese and vegan butter. I’ve tried Daiya shredded cheese—it melts well enough for this recipe!
- Herb Swaps: Try basil, rosemary, or chives in the garlic butter for a different flavor profile. Sometimes I toss in a pinch of red pepper flakes for extra zing.
Personal favorite: I once made these with smoked gouda and a touch of caramelized onion inside—total flavor bomb! You can really have fun with the fillings. Just make sure whatever cheese you use melts nicely, and avoid anything too runny (like fresh mozzarella) unless you pat it dry first.
Serving & Storage Suggestions
Serving: These biscuit cheese bombs are best served warm, right out of the oven, while the cheese is still gooey and stretchy. I love piling them up in a bread basket with a little bowl of marinara or ranch for dipping. For parties, I stick in a few toothpicks to make grabbing easy.
Pairings: Serve as an appetizer for pizza night, next to a big bowl of tomato soup, or alongside a fresh salad. They also make a fun addition to any brunch spread—honestly, they disappear fast no matter where you put them!
Storing: If you have leftovers (rare in my house), let them cool fully, then pop into an airtight container. They’ll keep in the fridge for up to 3 days. For longer storage, freeze for up to a month—just wrap in foil and stick in a freezer bag.
Reheating: Warm in the oven at 350°F (175°C) for 5-7 minutes, or microwave for 15-20 seconds. For crispy exteriors, the oven is best. The cheese stays melty, and the garlic butter flavor even intensifies after a day or two.
Note: The biscuits will soften a bit when stored, but they’re still delicious—sometimes I like them even better the next day!
Nutritional Information & Benefits
Each Pillsbury Biscuit Garlic Butter Cheese Bomb (made with standard-size biscuits and mozzarella) has approximately:
- Calories: 150
- Fat: 8g
- Carbohydrates: 14g
- Protein: 5g
Healthier swaps: Use reduced-fat cheese and light butter to cut down on calories and fat, or try plant-based cheese for a dairy-free version. Pillsbury’s biscuits contain wheat and dairy—so not gluten-free or vegan as written, but easy to adapt.
The cheese gives a nice protein boost, and you get a little calcium in every bite. Garlic and fresh herbs add flavor without extra calories—plus, garlic has those famous antioxidant benefits. These are a treat, for sure, but with a few tweaks you can make them fit your needs!
My take? They’re comfort food at its finest, but not something I’d eat every day. Perfect for sharing and special occasions—and hey, they’re better than most fried appetizers!
Conclusion
If you’re looking for a cheesy appetizer that’s impossibly easy, super tasty, and always a hit, these Pillsbury Biscuit Garlic Butter Cheese Bombs are the answer. I love how they come together in just 20 minutes, with no fancy ingredients or equipment—just pure, cheesy joy. You can get creative with the fillings, make them gluten-free or dairy-free, and they still turn out crowd-pleasing every time.
This recipe is close to my heart because it’s saved me from many “what do I serve?” panics, and it never fails to make people smile. Don’t be afraid to tweak the flavors or add your favorite cheese—you really can’t mess these up. If you try them, leave a comment below, share your cheesy creations on Pinterest, or pass this recipe to a fellow cheese lover. There’s nothing like homemade comfort food to bring people together!
So go ahead—preheat that oven, pop open a can of biscuits, and get ready to watch these cheese bombs vanish before your eyes. Happy baking!
Frequently Asked Questions
How do I keep the cheese from leaking out of my Pillsbury Biscuit Garlic Butter Cheese Bombs?
Make sure to pinch the biscuit dough tightly around the cheese, and roll it into a smooth ball. Any small holes can let the cheese escape while baking.
Can I use other types of cheese for this recipe?
Absolutely! Try cheddar, pepper jack, gouda, or even a dairy-free cheese. Just choose a cheese that melts well for the best results.
Can I make these biscuit cheese bombs ahead of time?
Yes, you can assemble them a few hours in advance and store in the fridge. Bake right before serving for the freshest taste and best cheese pull.
What’s the best dipping sauce for garlic butter cheese bombs?
Marinara is a classic choice, but ranch, garlic aioli, or spicy sriracha mayo are also delicious. Pick your favorite or try a few options!
How do I reheat leftover cheese bombs without drying them out?
Reheat in a 350°F (175°C) oven for 5-7 minutes, or microwave for 15-20 seconds. The oven keeps the outside crispy, while the microwave is quick for a softer texture.
Pin This Recipe!
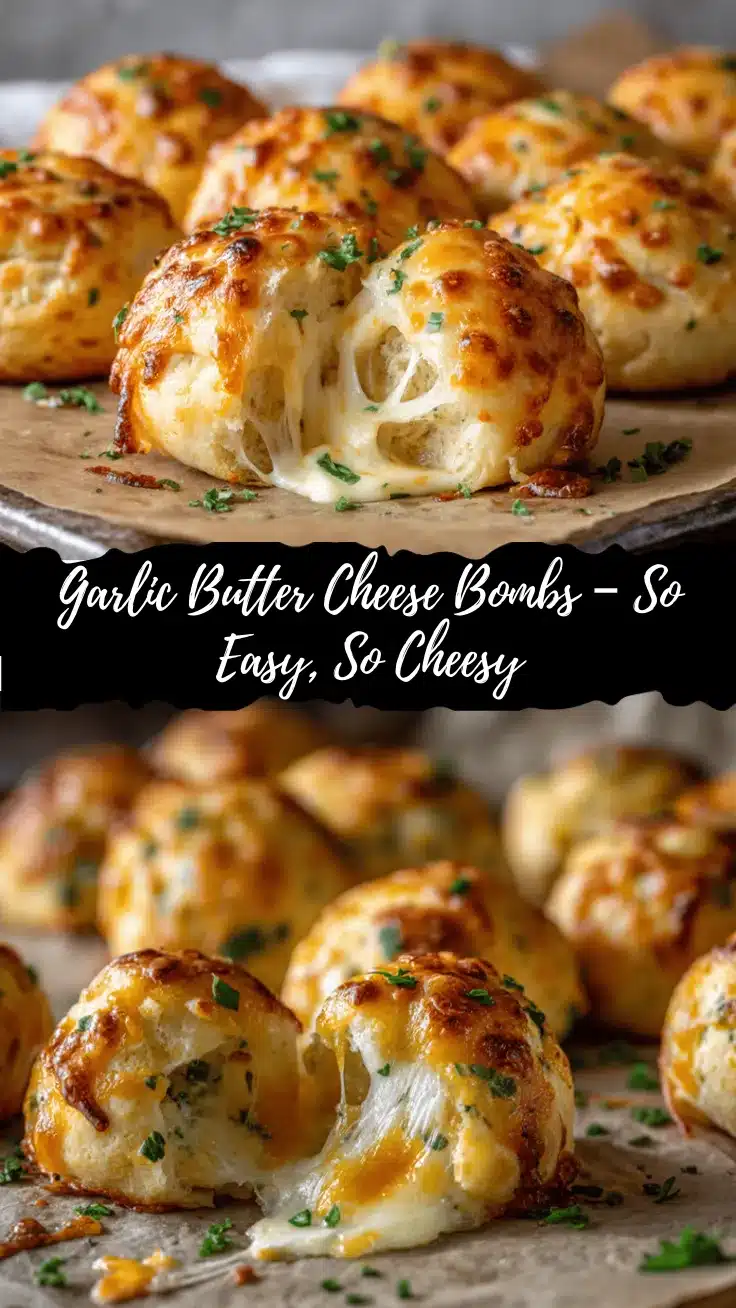

Pillsbury Biscuit Garlic Butter Cheese Bombs
- Total Time: 20 minutes
- Yield: 16 cheese bombs 1x
Description
Buttery, garlicky, and oozing with cheese, these easy Pillsbury Biscuit Garlic Butter Cheese Bombs are the ultimate cheesy appetizer. Ready in just 20 minutes, they’re perfect for parties, game days, or whenever you crave a quick, crowd-pleasing snack.
Ingredients
- 1 can (16.3 oz) Pillsbury Grand Biscuits (original or buttermilk style)
- 8 oz mozzarella cheese, cut into 16 cubes
- 4 oz cheddar cheese, cut into cubes (optional)
- 1/4 cup (4 tbsp) unsalted butter, melted
- 2–3 cloves fresh garlic, minced (or 1 tsp garlic powder)
- 1–2 tbsp fresh parsley, finely chopped (or 1–2 tsp dried parsley)
- 2 tbsp grated parmesan cheese (for topping, optional)
- Salt and black pepper, to taste
Instructions
- Preheat oven to 375°F (190°C). Line a baking sheet with parchment paper or a silicone baking mat.
- In a small bowl, melt the butter. Stir in minced garlic, chopped parsley, a pinch of salt, and black pepper. Set aside.
- Open the can of biscuits and separate into 8 rounds. For smaller bombs, cut each biscuit in half to make 16 pieces.
- Flatten each biscuit round to about 1/4-inch thick. Place a cube of mozzarella (and cheddar, if using) in the center.
- Fold the dough edges up and around the cheese, pinching to seal tightly. Roll into a smooth ball.
- Place the stuffed balls seam-side down on the prepared baking sheet, spacing them apart.
- Brush each ball generously with the garlic butter mixture. Reserve a little butter for after baking if desired.
- Sprinkle grated parmesan over the tops.
- Bake for 12-15 minutes, until golden brown and puffed. Start checking at 12 minutes.
- Remove from oven and brush with any remaining garlic butter. Let cool for 2-3 minutes before serving.
- Serve warm with marinara, ranch, or your favorite dipping sauce.
Notes
Pinch the seams tightly to prevent cheese leaks. For a crispier bottom, bake directly on a greased pan. You can prep ahead and refrigerate unbaked bombs for up to 4 hours. Use different cheeses or add-ins like pepperoni for variations. Let cool slightly before serving to avoid burns from hot cheese.
- Prep Time: 8 minutes
- Cook Time: 12 minutes
- Category: Appetizer
- Cuisine: American
Nutrition
- Serving Size: 1 cheese bomb
- Calories: 150
- Sugar: 2
- Sodium: 340
- Fat: 8
- Saturated Fat: 4
- Carbohydrates: 14
- Protein: 5
Keywords: cheese bombs, garlic butter, Pillsbury biscuits, cheesy appetizer, easy snack, party food, game day, quick appetizer, mozzarella, comfort food